Quick answer
To turn your photo into a GTA 6 character, run a clear selfie through an AI image model with a prompt that names the style — 'Grand Theft Auto VI loading-screen portrait' for the illustrated look, or 'photoreal GTA 6 in-game screenshot' for the viral real-to-GTA look. This guide shows real before/after results in nine styles from one single photo — loading-screen portrait, photoreal in-game render, Vice City poster, retro synthwave, gameplay screenshot with the HUD, WANTED mugshot, WASTED death screen, a six-panel photo dump, and a video thumbnail — each with the exact prompt.
Turn Your Photo Into GTA 6
There are two GTA AI image trends running right now, and they look completely different. The original is the illustrated "GTA Me" loading-screen portrait — cel-shaded, bold outlines, that painted Rockstar cover-art finish. The newer, currently-viral one is the photoreal "real to GTA" look (the Gemini / "Nano Banana" trend) — your photo turned into what looks like an actual in-game screenshot, not a drawing.
To show the range, we took one regular photo — a normal guy smiling on the street — and ran it through AI nine ways. Same input every time; only the prompt changed. The first four are the portrait styles; after that it gets stranger, into the game-screen formats people actually search for: the gameplay screenshot with a HUD, the WANTED mugshot, the WASTED card.
Looking for a GTA 6 video or trailer, not a still? See How to Make a GTA 6 AI Video of Yourself — or skip straight to the GTA 6 Trailer template and star in a cinematic 15-second GTA 6 trailer from one selfie.
1. The GTA "Loading-Screen" Character ("GTA Me")
The head-term, evergreen look: a single-subject illustrated portrait, cel-shaded with bold outlines and a neon Vice City sunset behind. This is what "turn yourself into a GTA character" usually means.
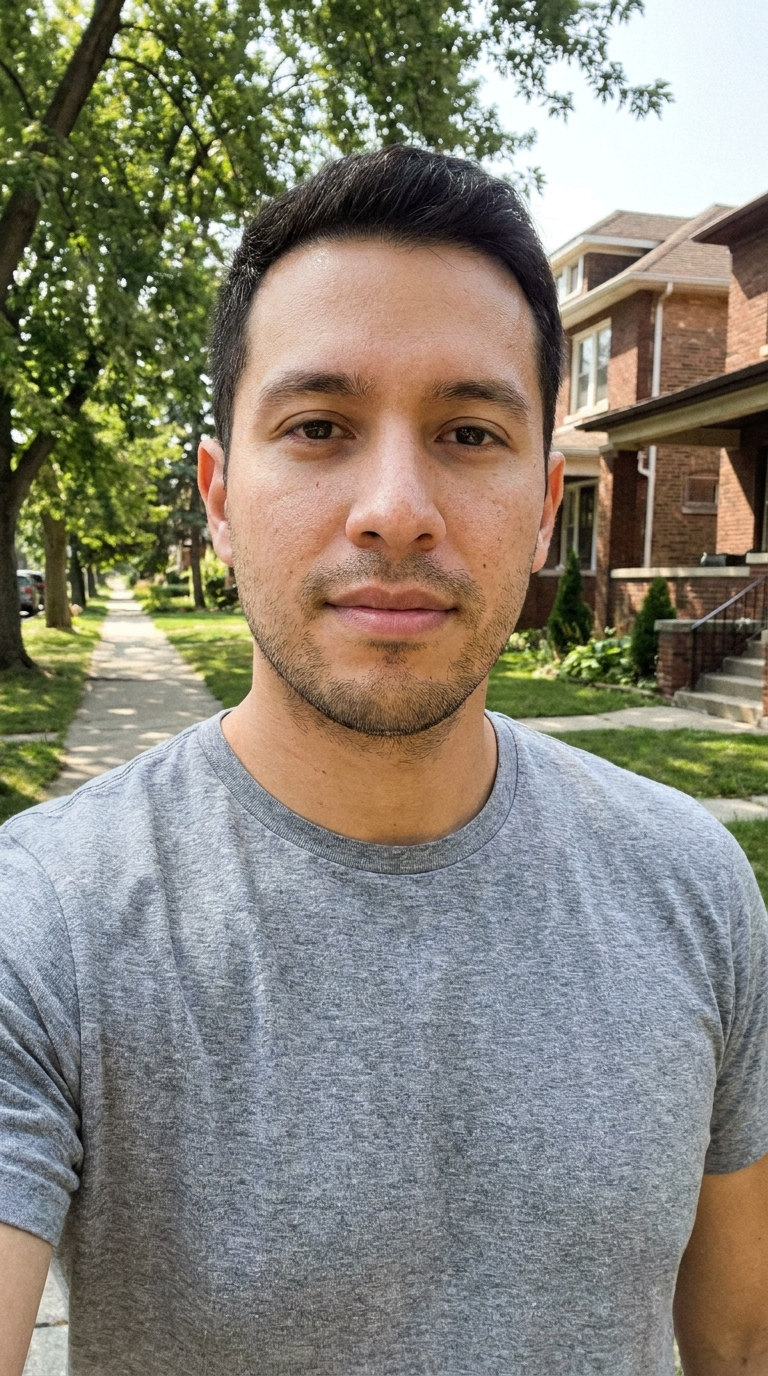
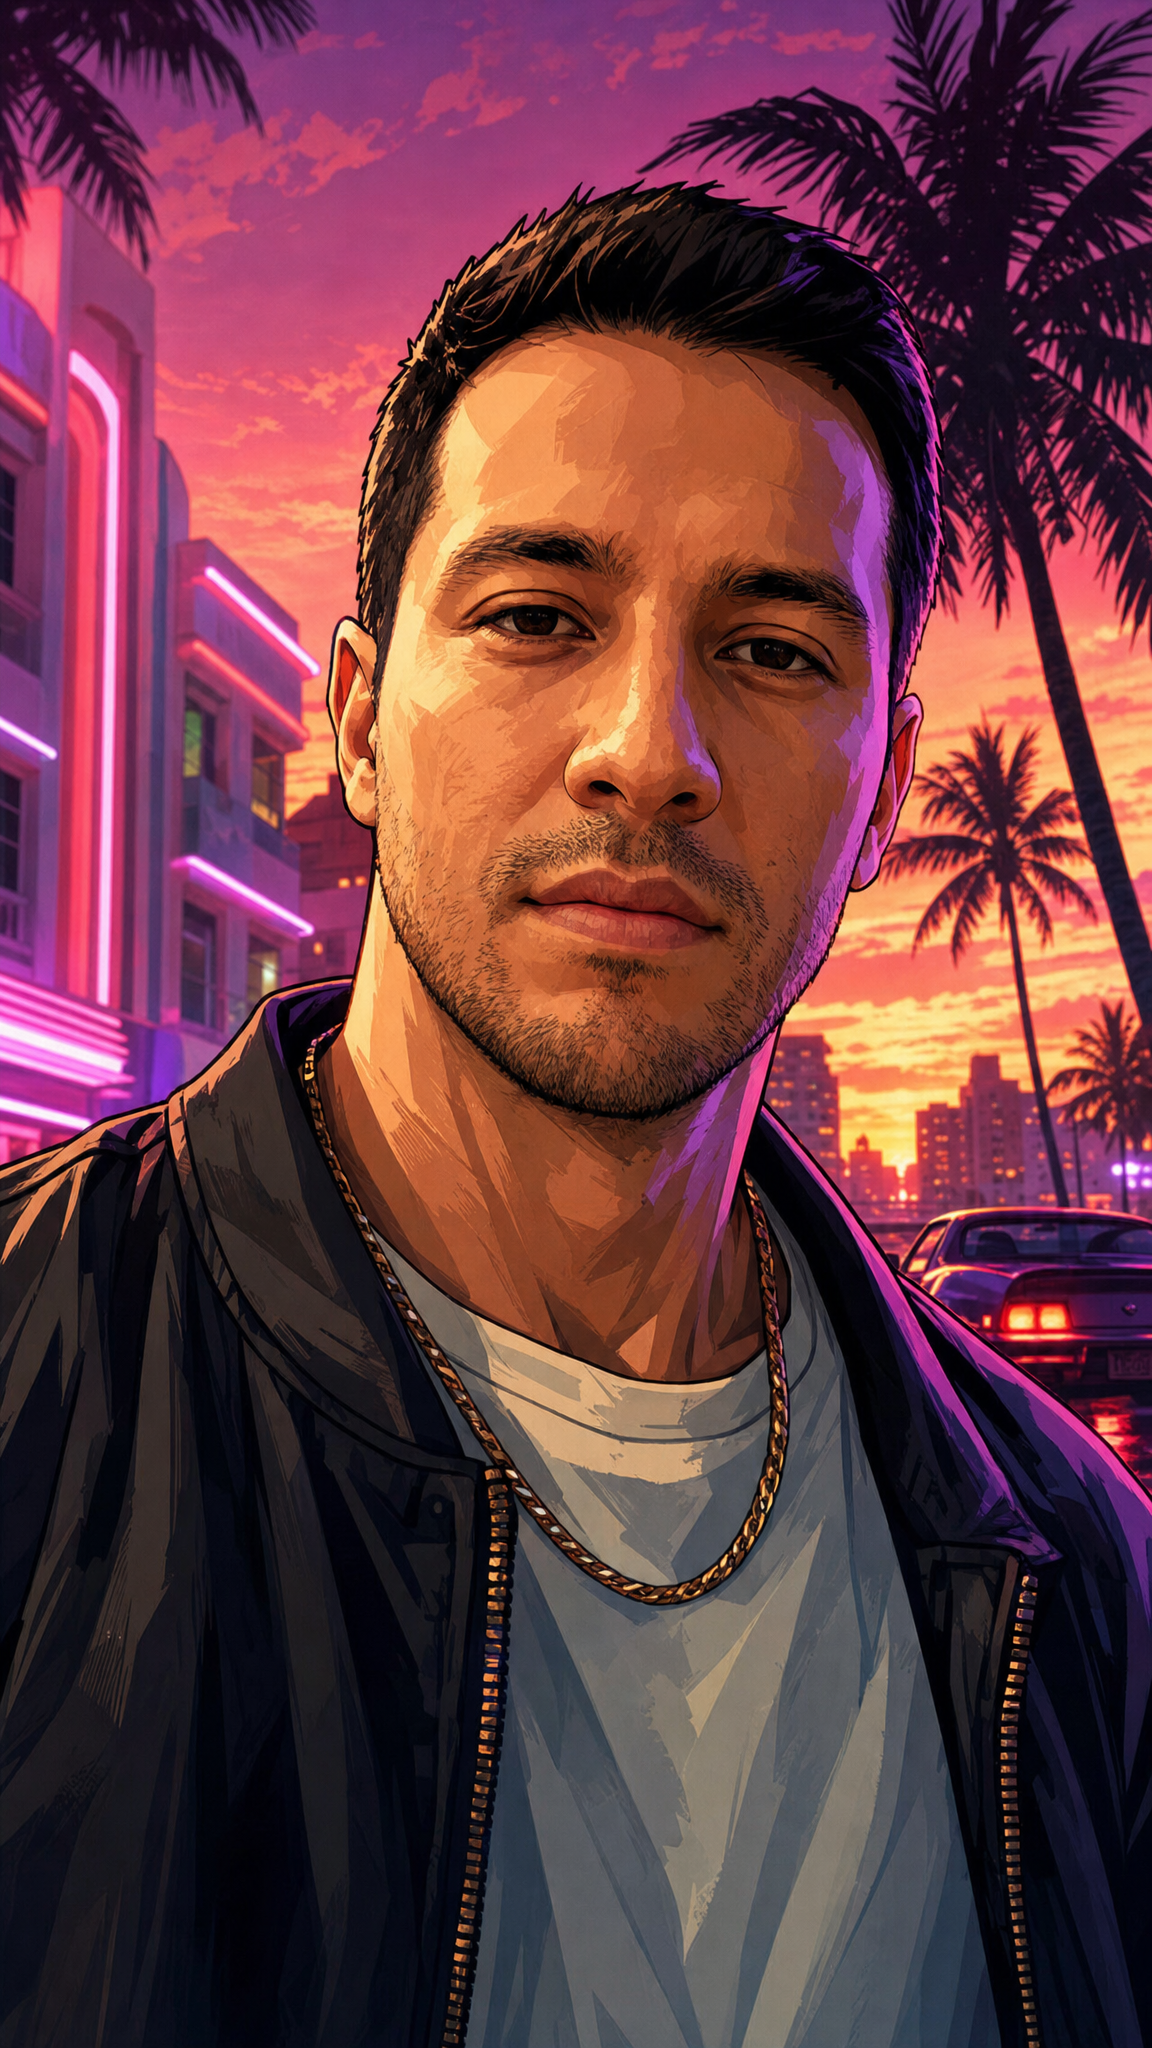
Prompt used
Transform the uploaded photo into a Grand Theft Auto VI (GTA 6) loading-screen character portrait, illustrated GTA cover-art style. Keep my face recognizable; re-render with bold clean outlines, semi-realistic cel-shading, saturated color, dramatic shadows, and streetwear, against a neon Vice City sunset with palm silhouettes and soft purple light. Give me a cool, confident, moody main-character aura — a hard cold stare at the camera, mouth closed, absolutely not smiling. Vertical 9:16. No logos or text.
2. Photoreal "Real to GTA" In-Game Screenshot
The viral one. Not a drawing — it looks like a real 4K gameplay frame, with no HUD or UI. The "before → game" reveal is the whole appeal.
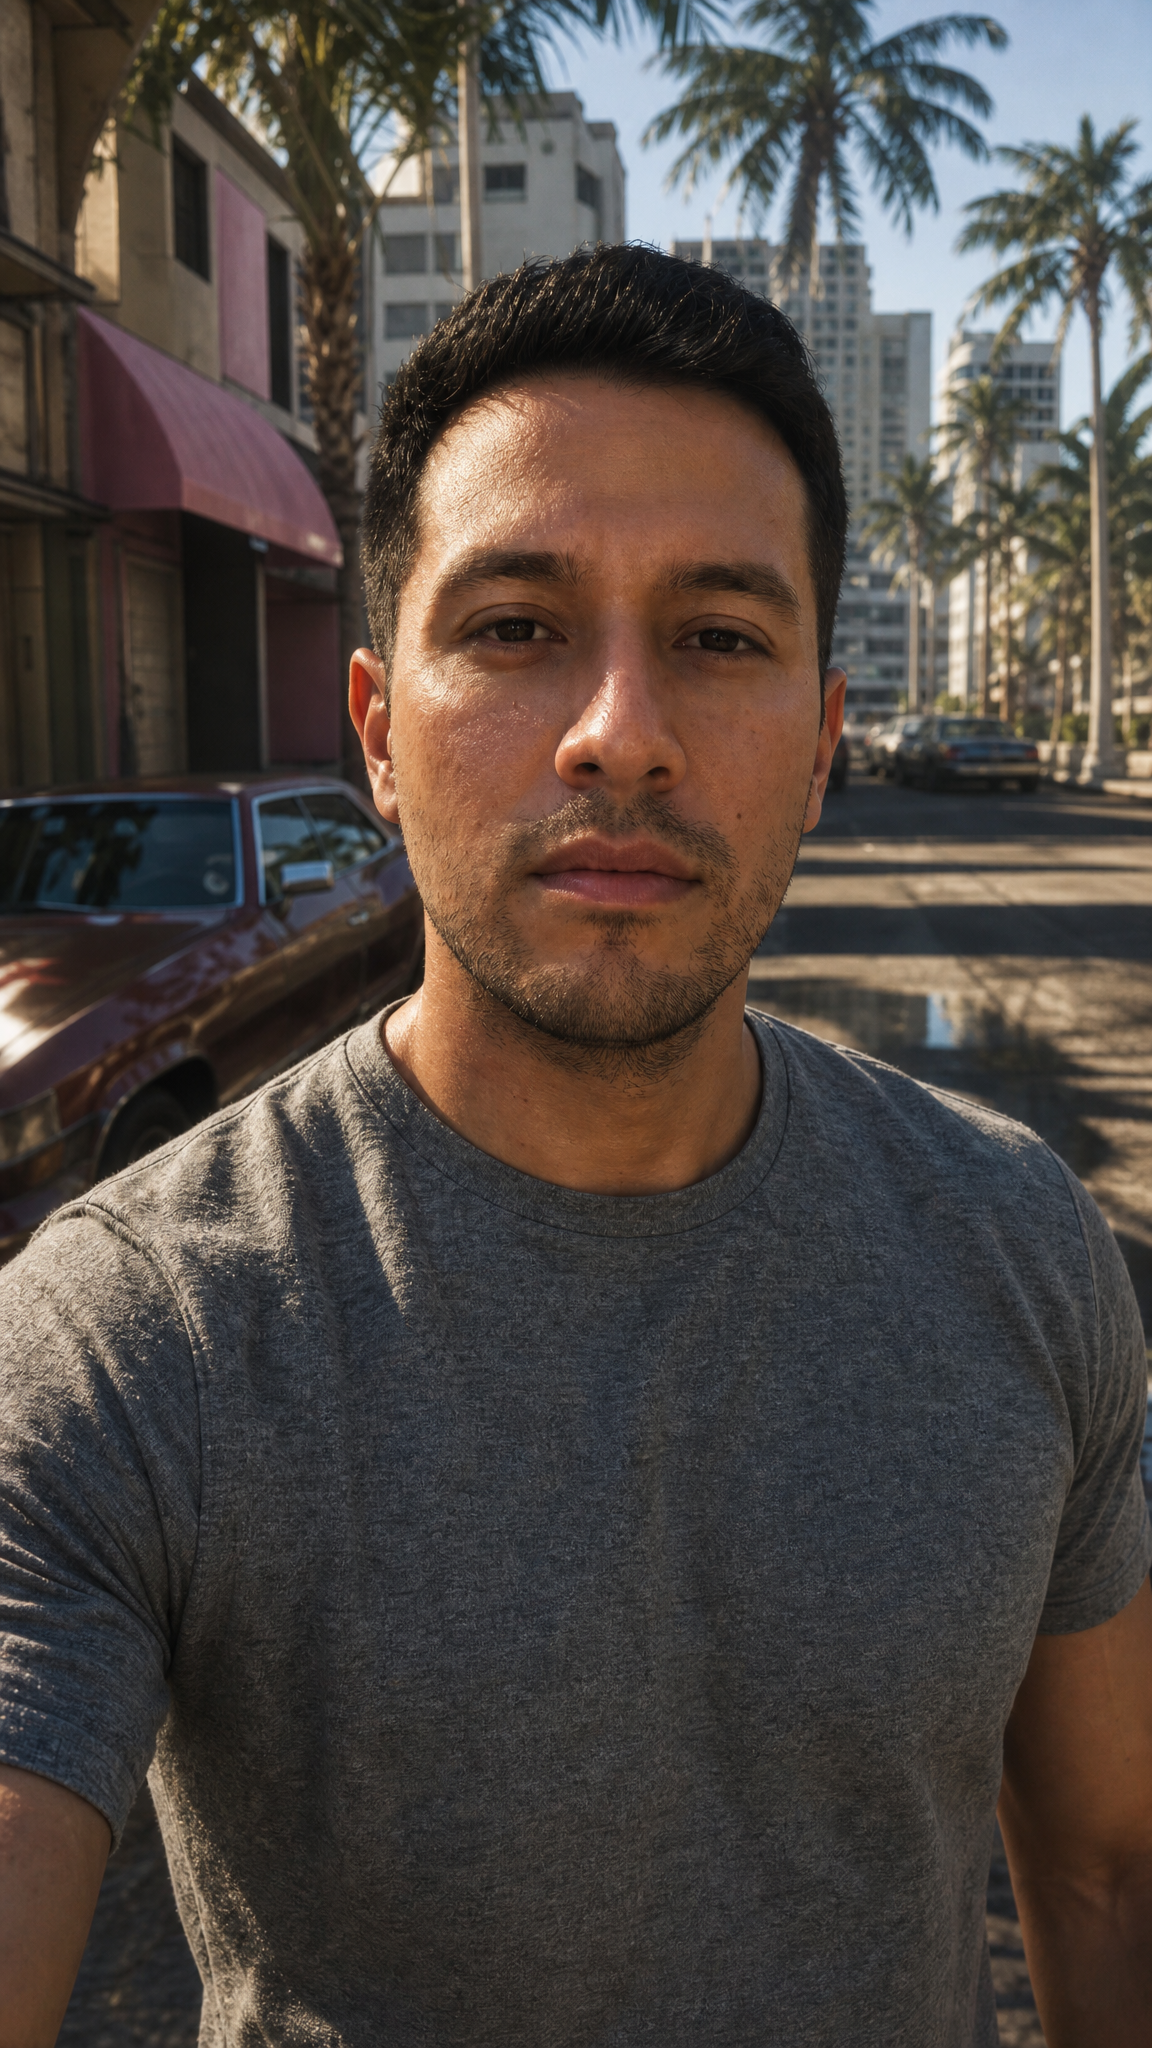
Prompt used
Convert the uploaded photo into a photoreal Grand Theft Auto VI (GTA 6) in-game screenshot — a real-looking 4K gameplay frame, not illustrated, with no HUD or UI. Keep my face; render me as an in-engine character on a sun-bleached Vice City street with palm trees and parked cars, gameplay-level sharpness. Give me a cool, moody main-character aura — serious and unbothered, a cold stare at the camera, mouth closed, not smiling. Vertical 9:16. No logos or text.
3. Vice City Neon Poster
The most shareable format — movie-poster energy: low-angle hero shot, a sports car behind you, wet neon streets, the pink-purple "Vice" palette.
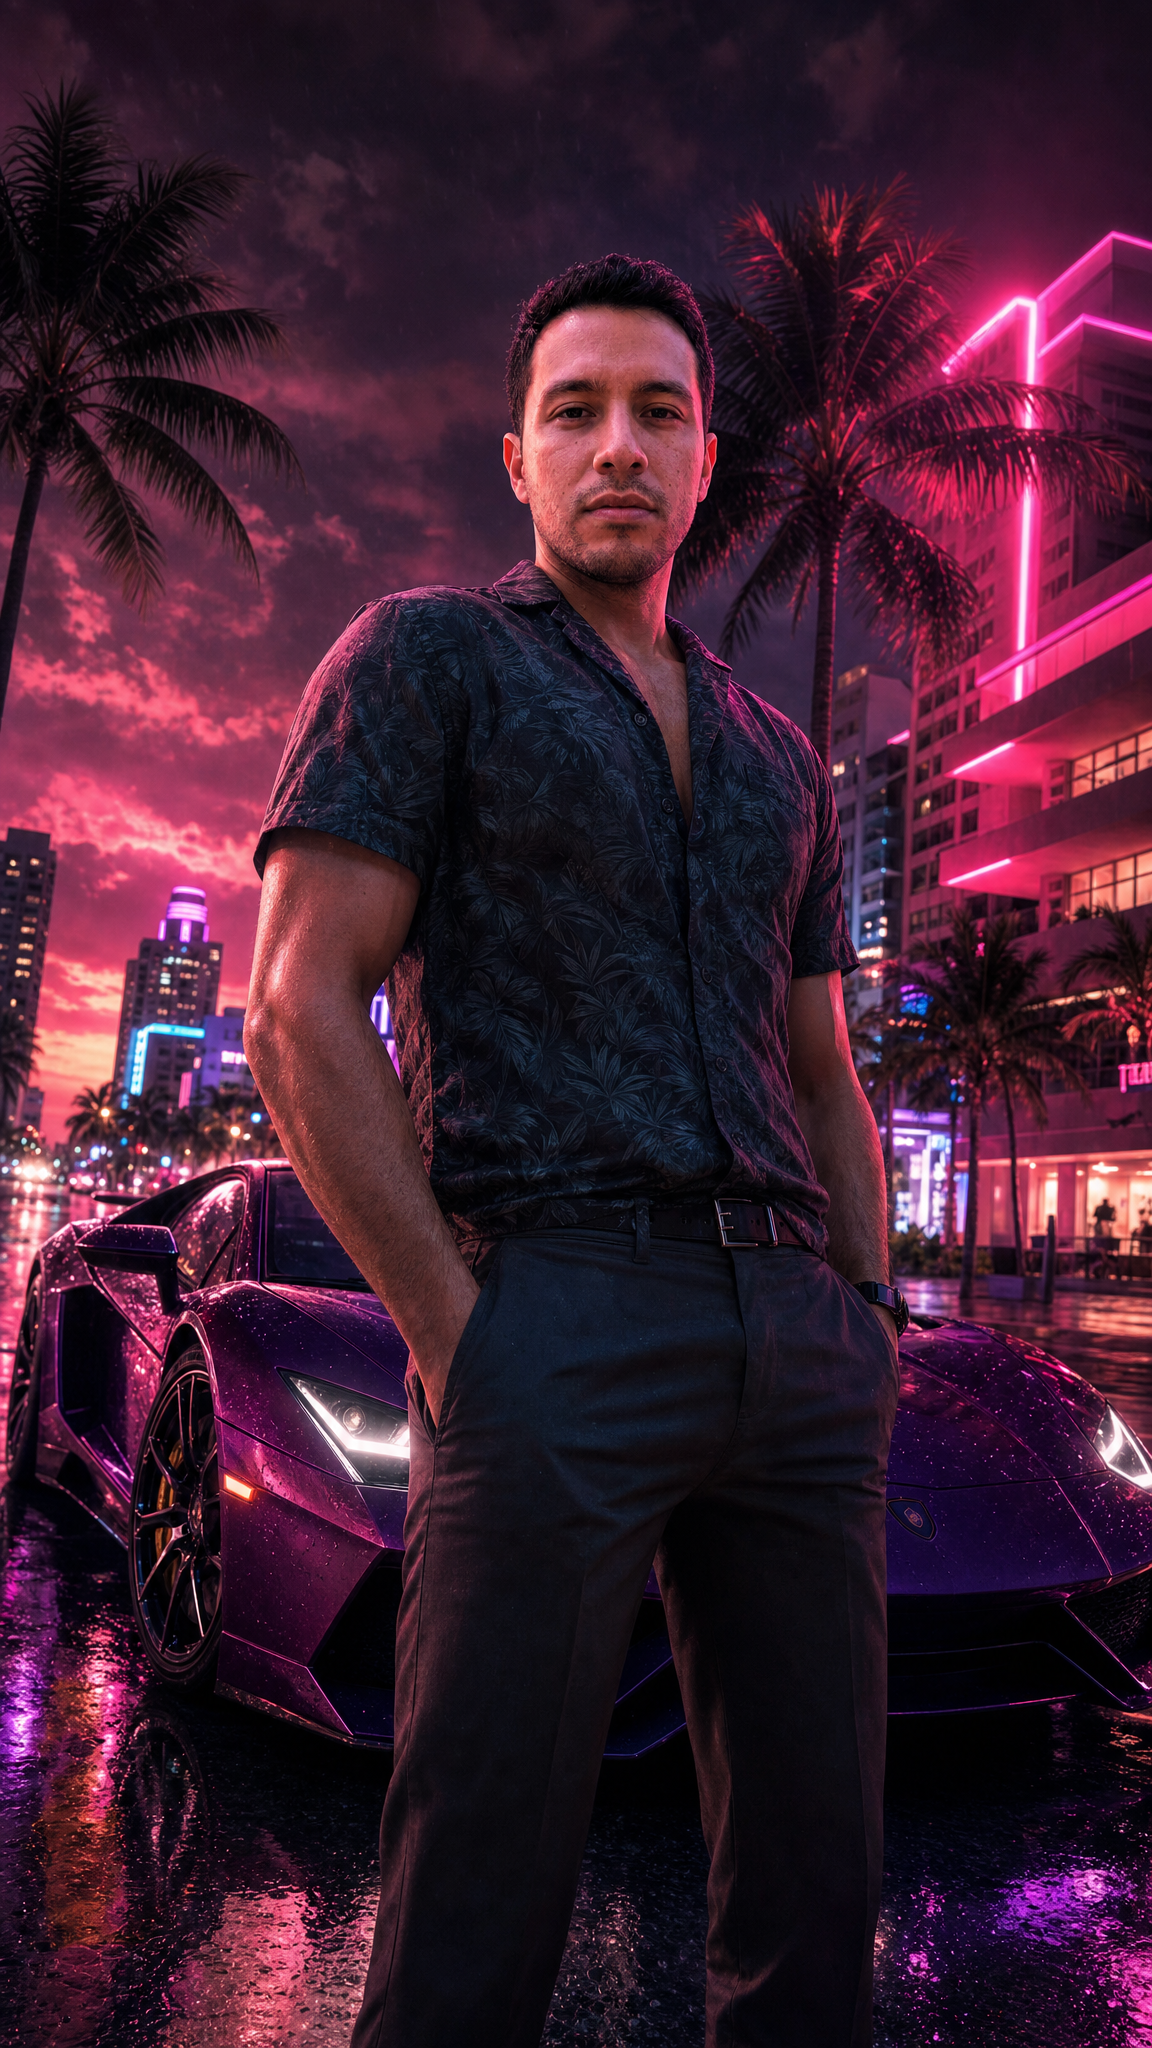
Prompt used
Turn the uploaded photo into a cinematic Grand Theft Auto VI (GTA 6) key-art poster — low-angle hero shot, an exotic sports car behind me, wet asphalt with rain reflections, neon Miami nightlife, a pink-and-purple Vice palette, glossy promotional-art style. Give me a cool, confident, moody main-character aura — serious and unbothered, a hard cold stare, mouth closed, not smiling. Vertical 9:16. No logos or text.
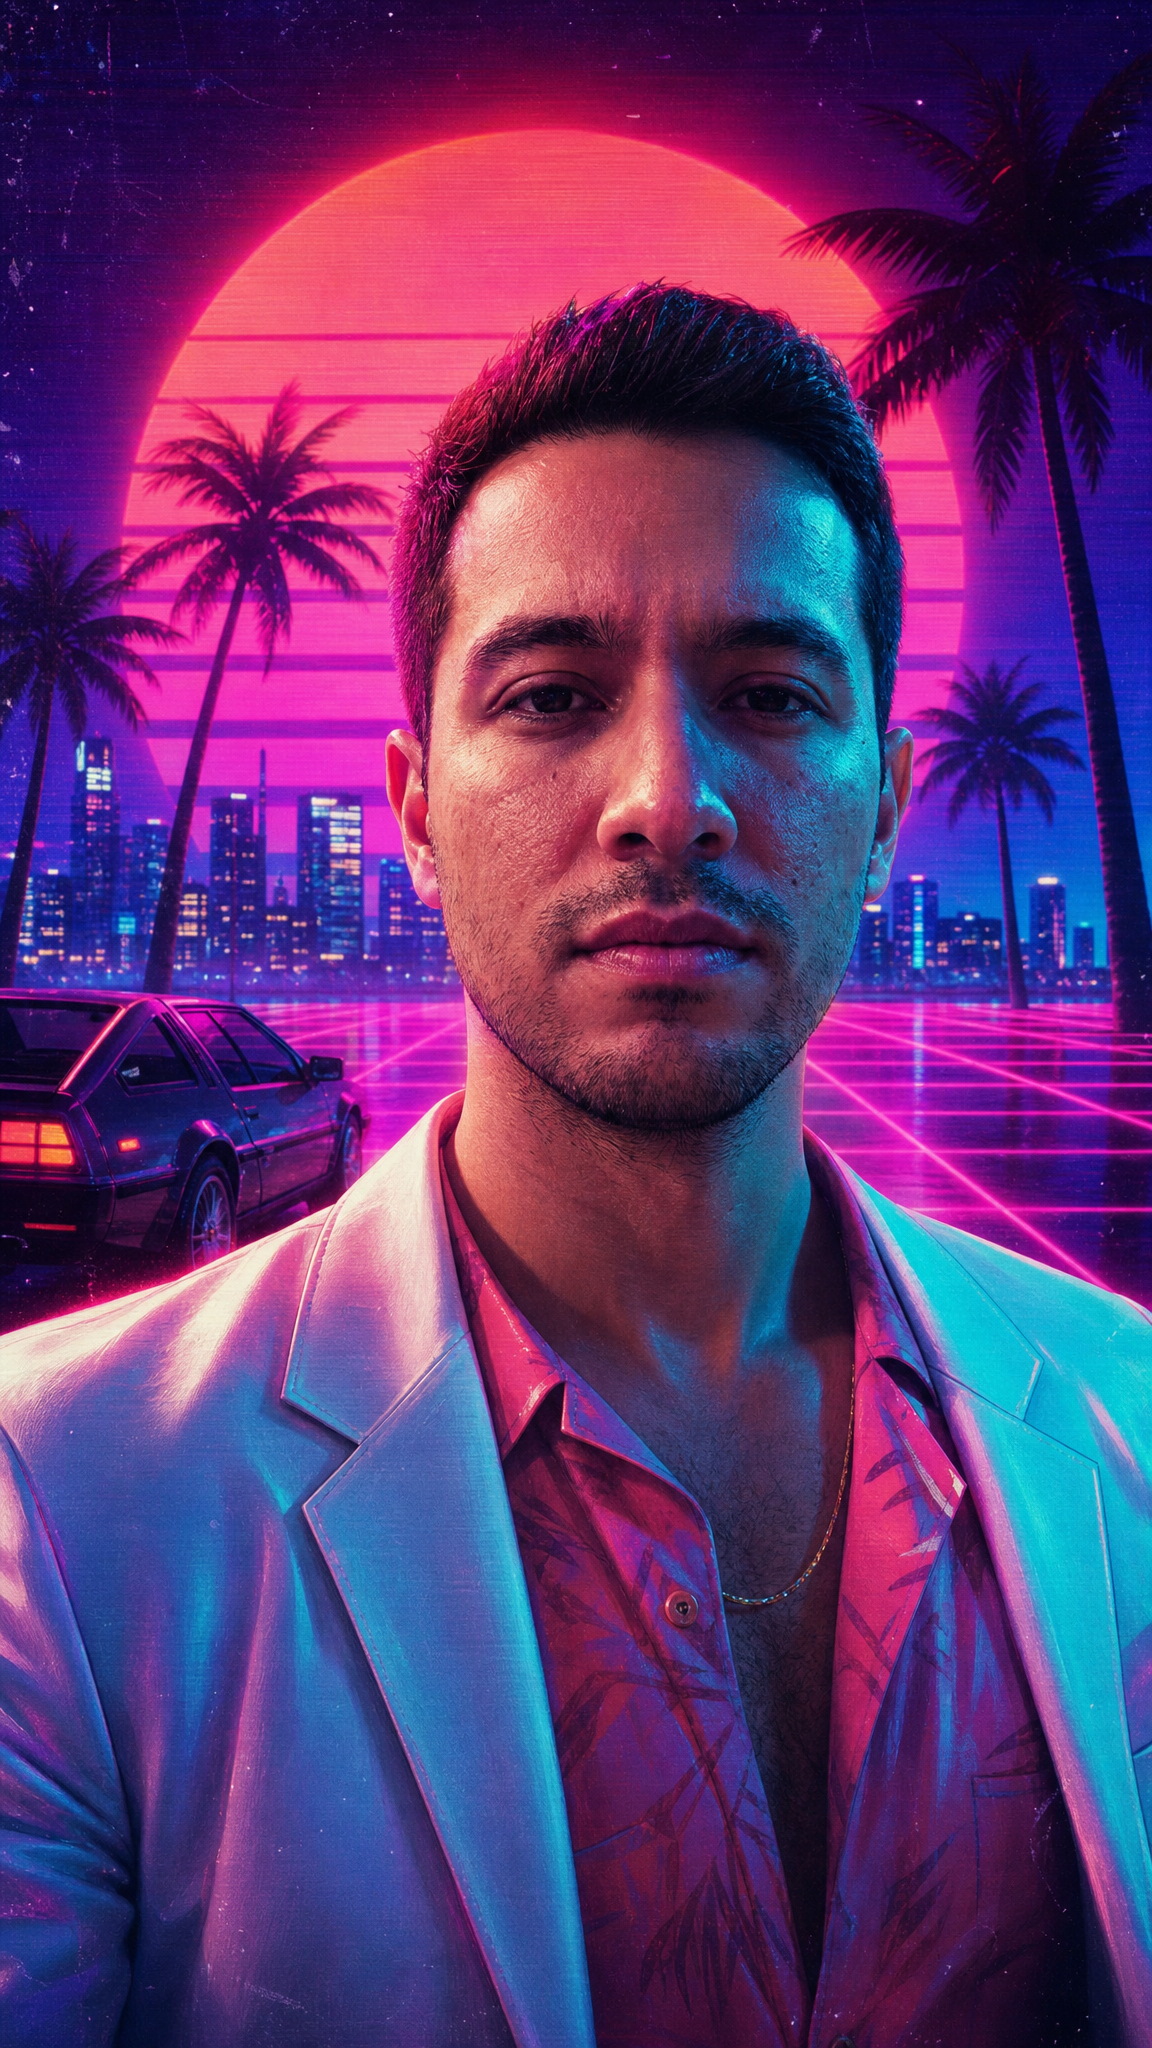
4. Retro Vice City Synthwave
The retro end of the spectrum — 1980s outrun: neon grid horizon, geometric sun, palm silhouettes, VHS grain. A different color story from the modern GTA VI look.
Prompt used
Turn the uploaded photo into a 1980s synthwave Grand Theft Auto Vice City poster — retro outrun look, neon pink, cyan and purple, a glowing geometric sun and grid horizon, palm silhouettes, VHS grain. Give me a cool, moody main-character aura — serious, unbothered, mouth closed, not smiling. Vertical 9:16. No readable text or logos.
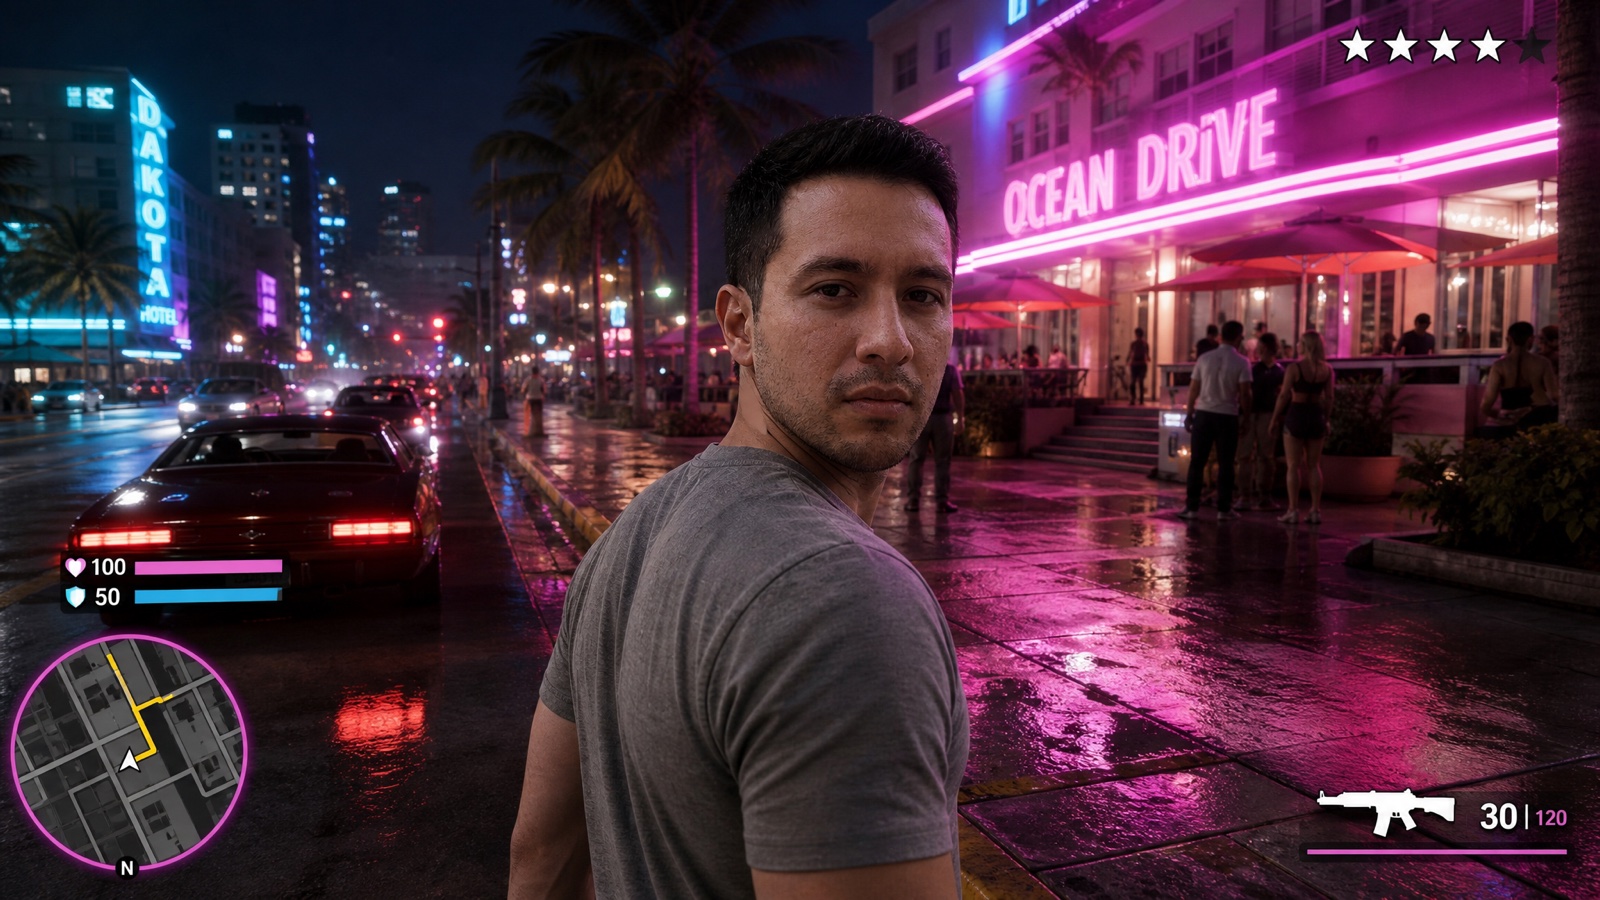
5. The Gameplay Screenshot (With the HUD)
The detail that sells the fake. A clean in-game render reads as a nice photo; add the minimap, the health and armor bars, the wanted stars and an ammo counter and it reads as a screenshot someone took mid-mission. This is its own trend, and the opposite of style 2 above.
Same source photo
Style 5 — Screenshot with the HUD
Prompt used
Render the person in the uploaded photo as a Grand Theft Auto VI style third-person gameplay screenshot, camera behind and slightly above them on a neon Vice City street at night. Keep my face, hairstyle, and skin tone clearly recognizable — do not beautify or replace my features. Give me a cool, confident, moody main-character aura: a hard cold stare into the camera, mouth closed, absolutely not smiling. Overlay an invented open-world game HUD in the style of the genre: a circular minimap with a route line in the bottom-left corner, thin health and armor bars above it, a small weapon icon with an ammo counter in the bottom-right, and a row of wanted stars in the top-right. Keep the HUD crisp, flat and readable. Photoreal in-engine render, 16:9. Invented UI only — No real logos, no brand marks, no watermark.
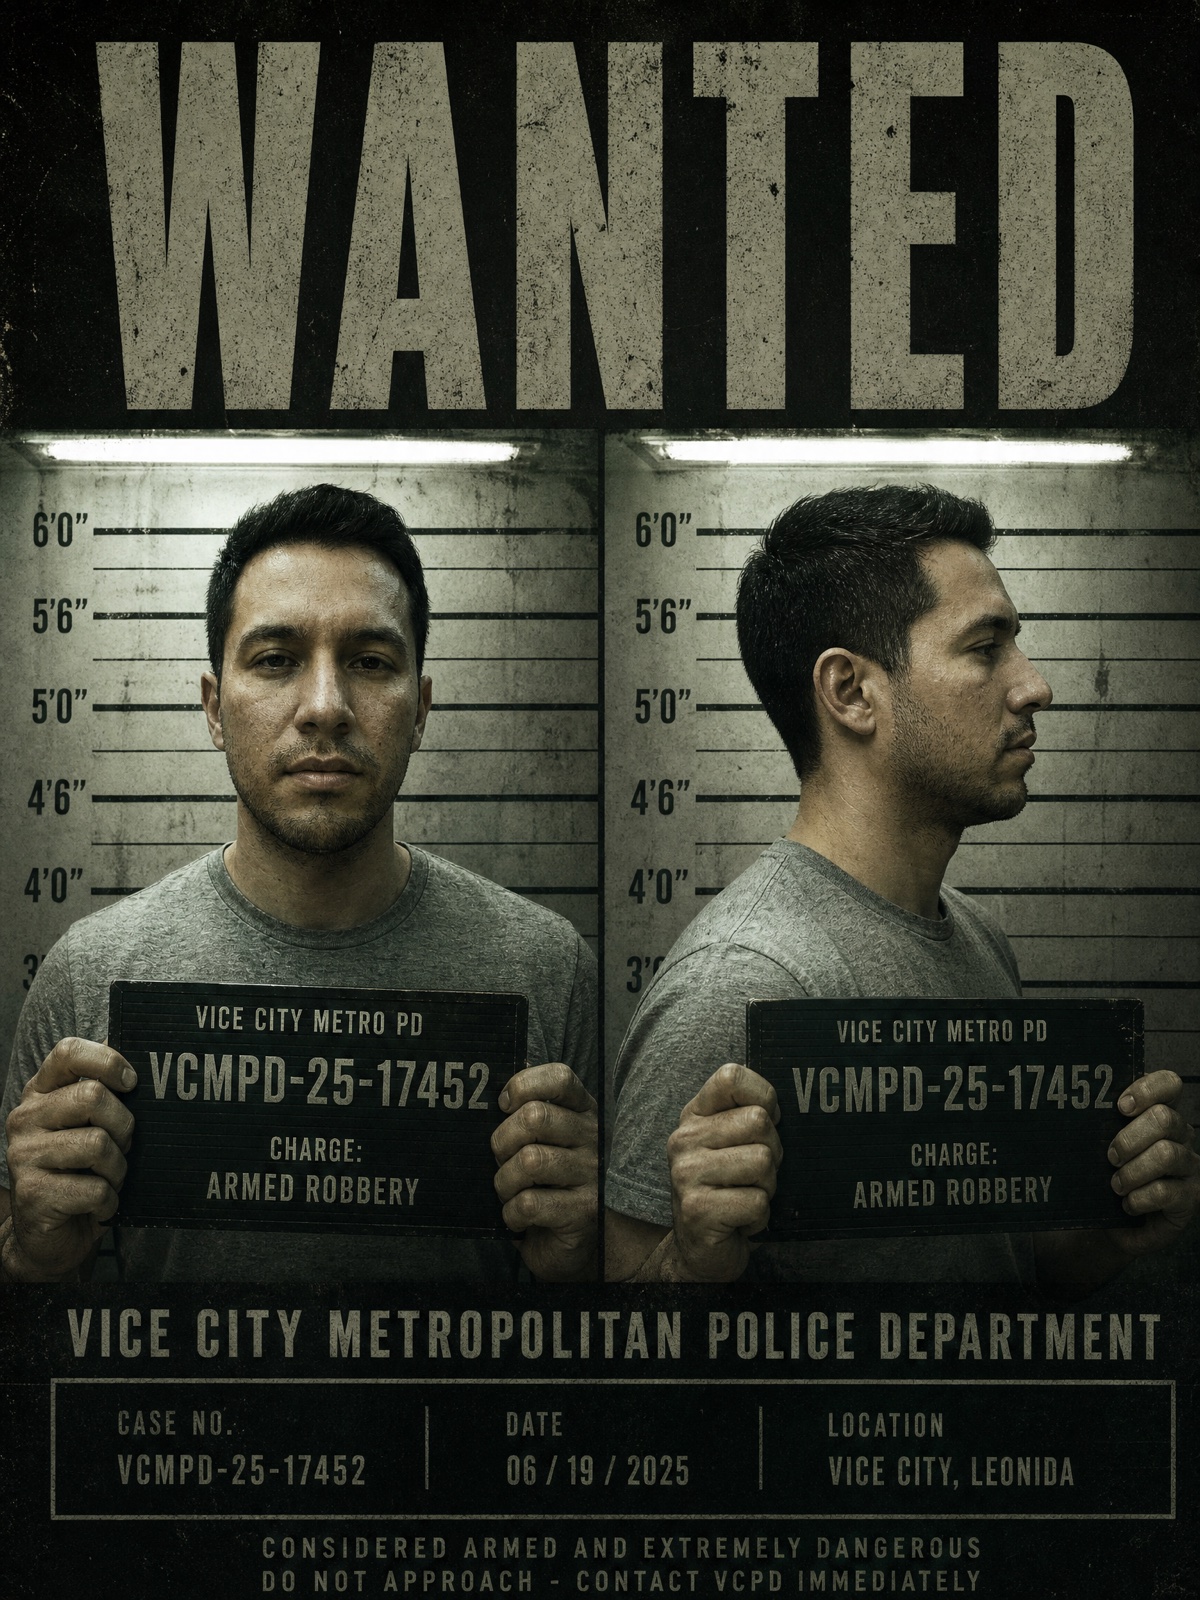
6. The WANTED Mugshot
Front and profile against the height chart, holding a placard. The most meme-able format on this page, and the one people most often want with a friend's face in it.
Same source photo
Style 6 — WANTED mugshot
Prompt used
Turn the uploaded photo into a Grand Theft Auto VI style police booking poster. Keep my face, hairstyle, and skin tone clearly recognizable — do not beautify or replace my features. Give me a cool, confident, moody main-character aura: a hard cold stare into the camera, mouth closed, absolutely not smiling. Two panels side by side — front-facing and profile — against a scuffed height-chart wall under hard fluorescent light, me holding a placard with an invented case number and a made-up charge. Above the panels, the word WANTED in a heavy condensed display typeface. Gritty photoreal in-engine render, desaturated with a sickly green cast. Vertical 3:4. Use invented text and invented department names only — No real logos, no brand marks, no watermark.
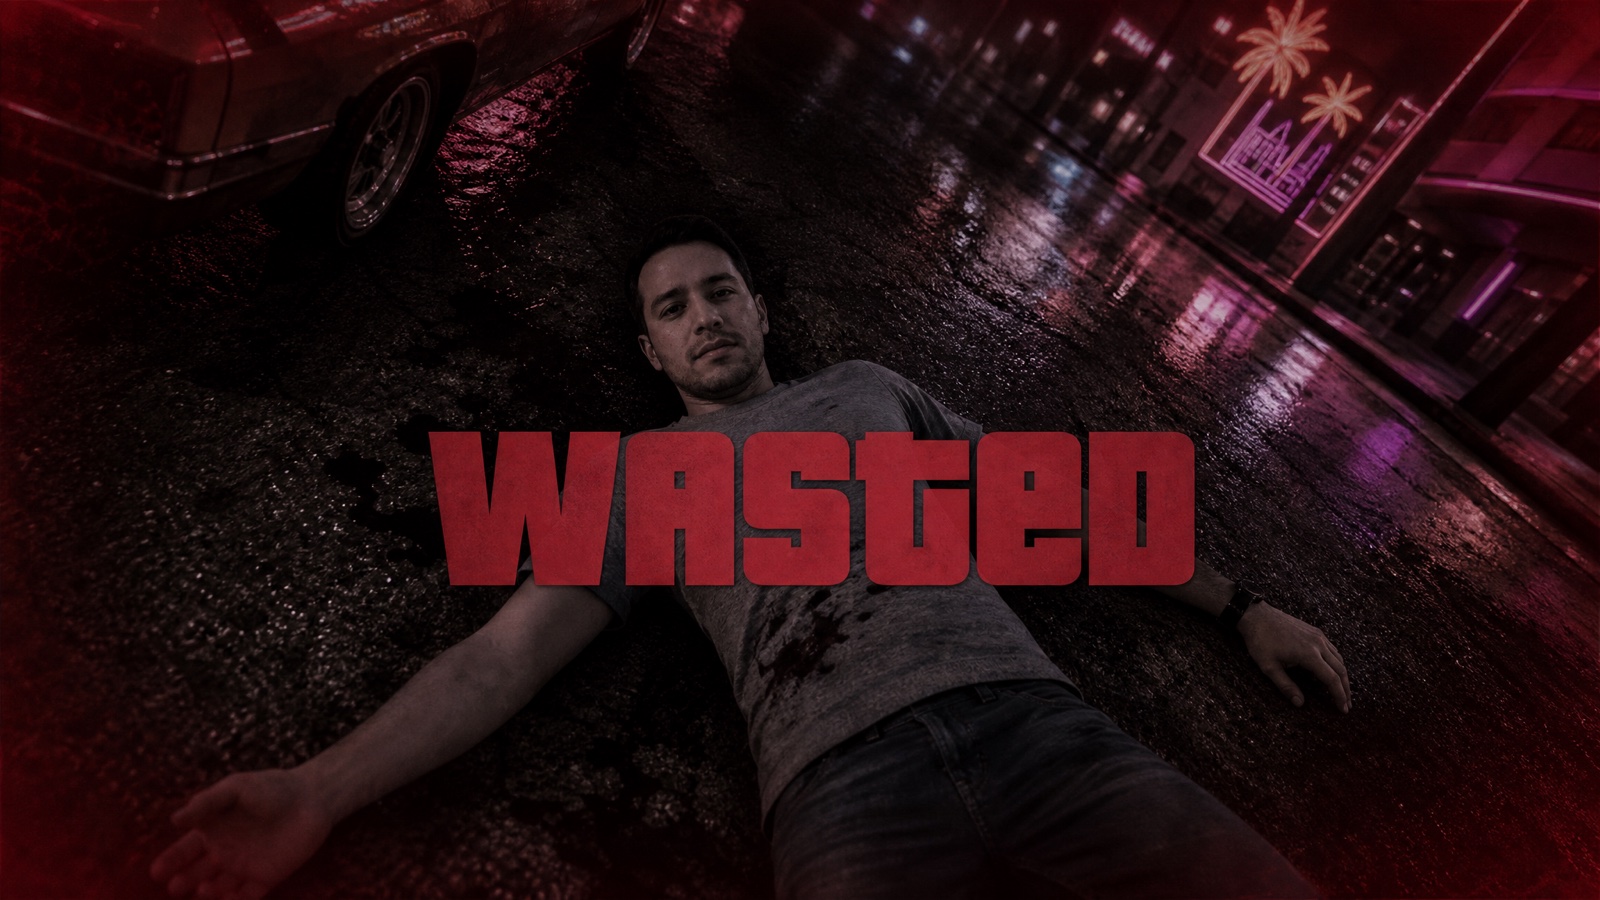
7. The WASTED Death Screen
Desaturated freeze-frame, red vignette, one enormous word. It's barely a portrait and it's the most instantly legible image here — everyone who has played the games knows exactly what it is at thumbnail size.
Same source photo
Style 7 — WASTED death screen
Prompt used
Turn the uploaded photo into a Grand Theft Auto VI style death-screen frame. Render me lying on wet Vice City asphalt at night seen from a high angle, neon signs and a parked car around me, keeping my face recognizable. Apply a heavy desaturated wash with a strong red-black vignette and a slight blur, as if the game has frozen. Centered across the frame, the single word WASTED in a large heavy condensed display typeface. 16:9. Invented text only — No real logos, no brand marks, no watermark.
8. The Vice City Photo Dump
Six casual snapshots as if you actually live there — mirror selfie, leaning on a car, the gas station at night, the beach, the back seat, the diner. Consistency across all six panels is the hard part, and the instruction that fixes it is literally “consistent face across all six.”
Same source photo
Style 8 — Vice City photo dump
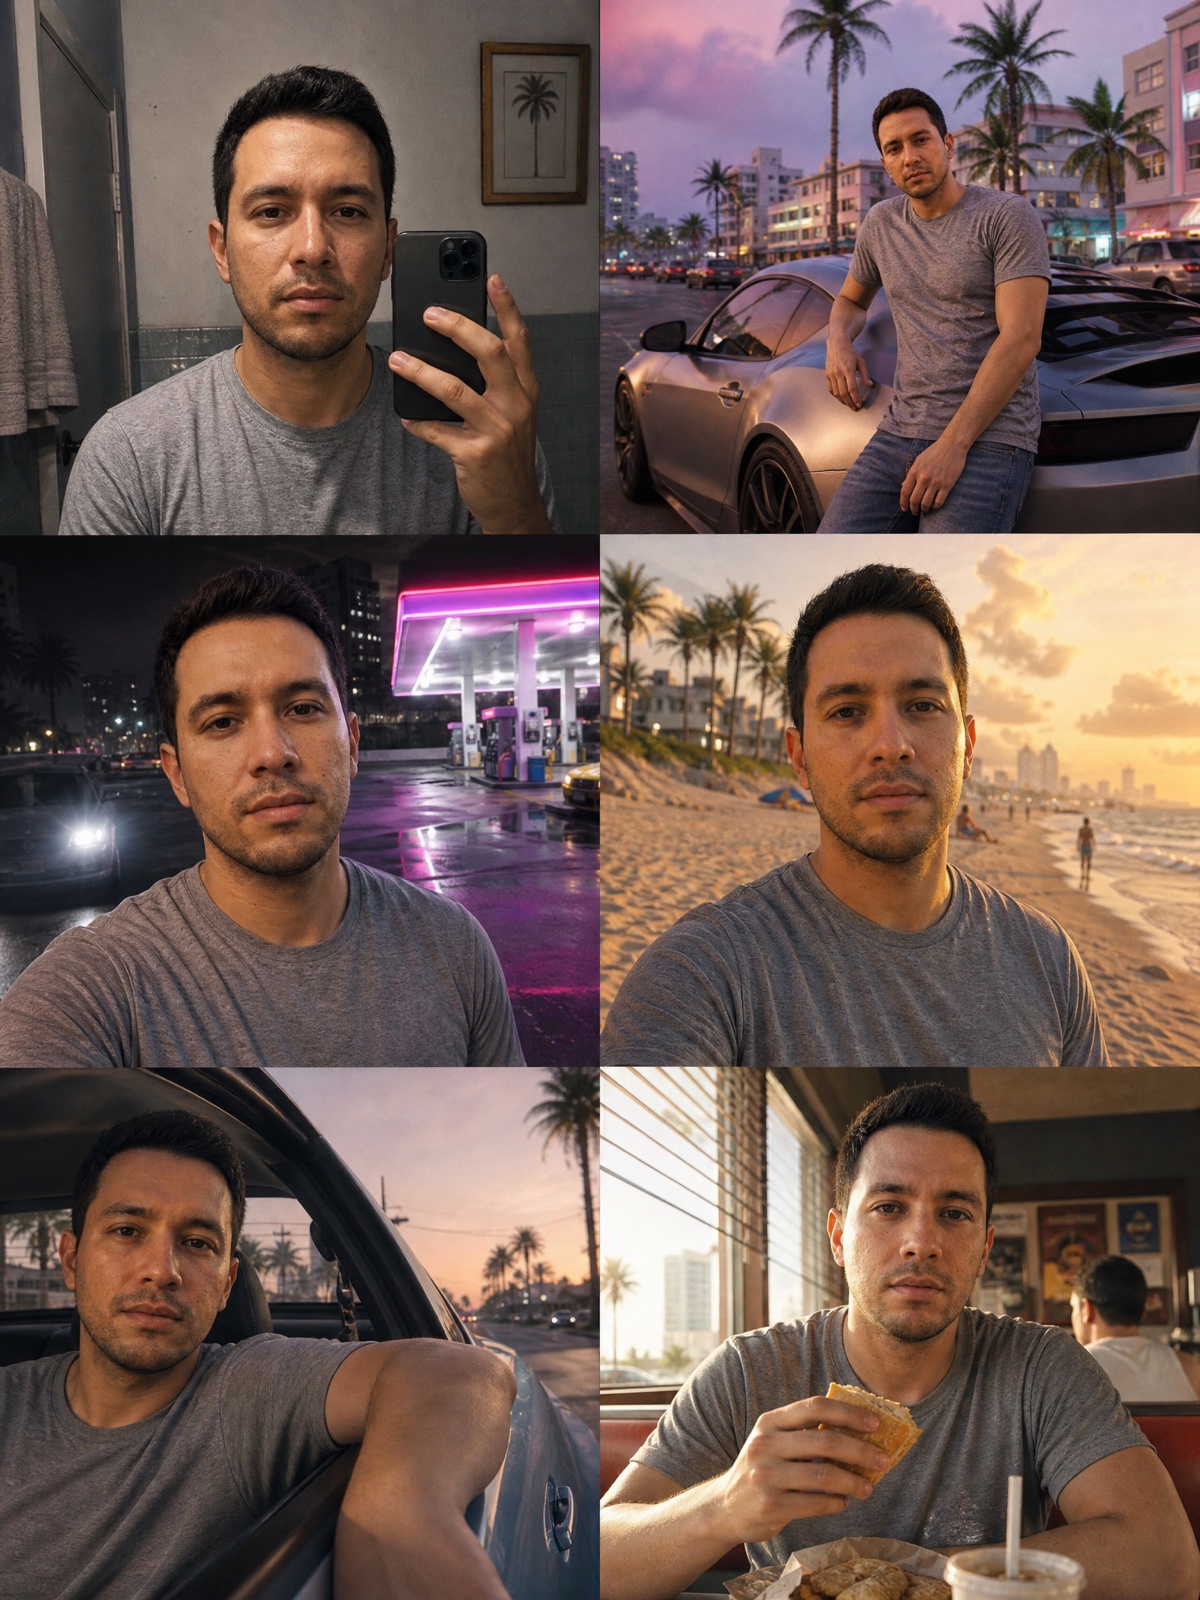
Prompt used
Using the uploaded photo, create a 2x3 grid of six casual snapshots of me living in the world of Grand Theft Auto VI, as if pulled from my camera roll. Keep my face, hairstyle, and skin tone clearly recognizable — do not beautify or replace my features. Give me a cool, confident, moody main-character aura: a hard cold stare into the camera, mouth closed, absolutely not smiling. Panels: a bathroom mirror selfie, leaning on a parked sports car, at a neon-lit gas station at night, on the beach at golden hour, in the back of a car with the window down, and eating at a roadside diner. Photoreal in-engine game render throughout, consistent face across all six, slightly imperfect amateur framing, warm Vice City palette. Vertical 3:4 overall. No captions, no HUD — No real logos, no brand marks, no watermark.
9. The Video Thumbnail
For anyone running a faceless GTA channel: big face on one side, a short bold headline on the other, punchy enough to survive being shrunk to 300px wide.
Same source photo
Style 9 — Video thumbnail
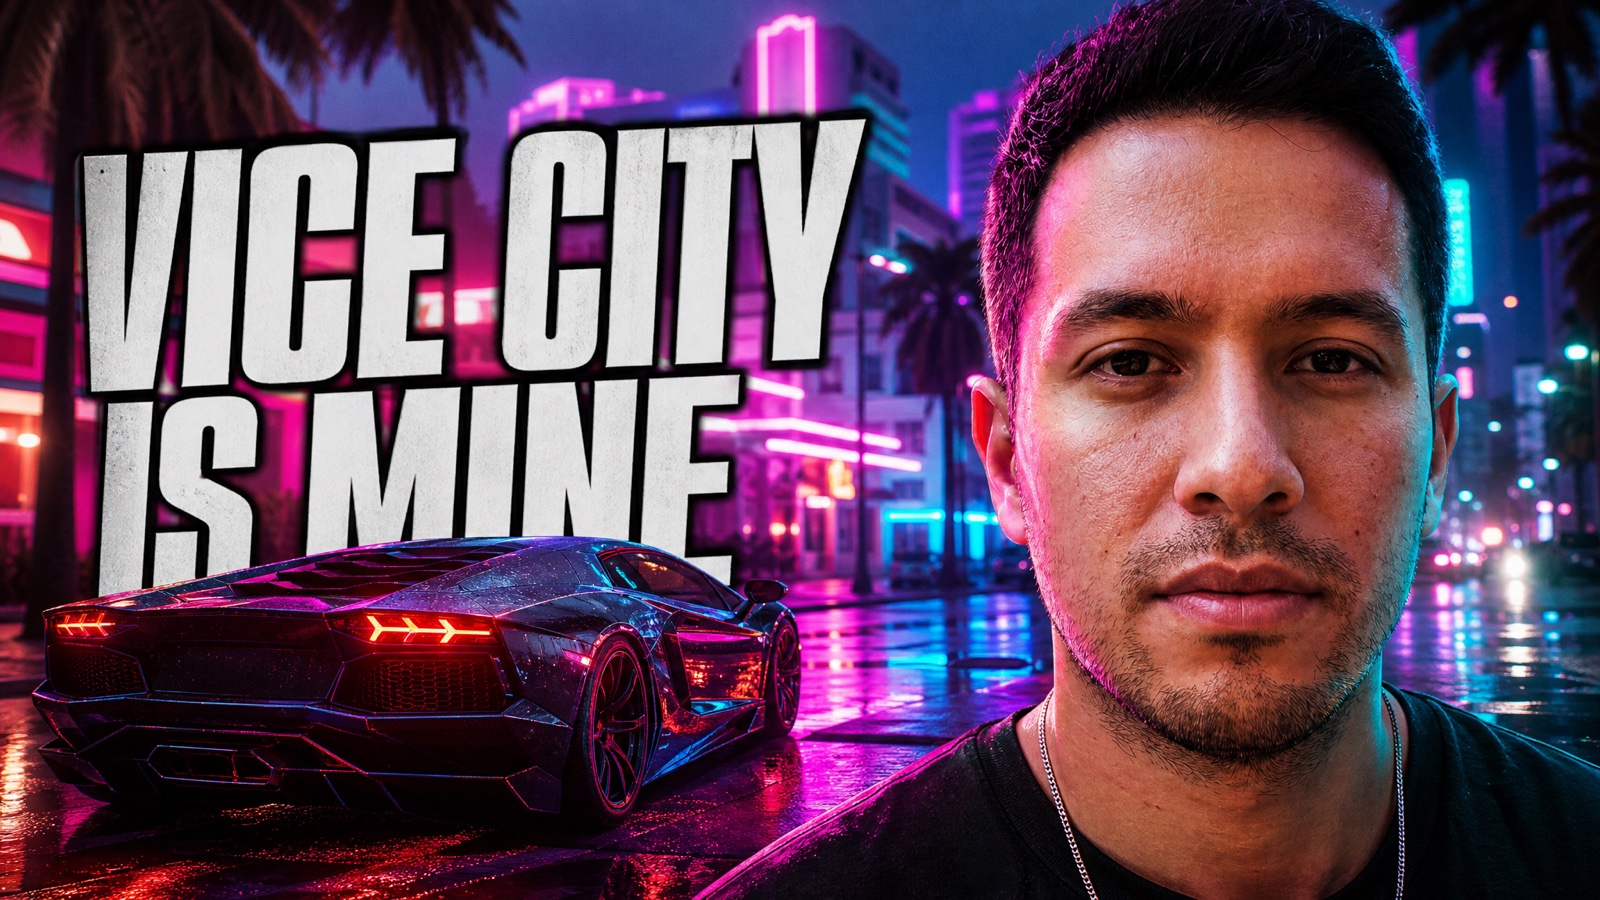
Prompt used
Turn the uploaded photo into a Grand Theft Auto VI style video thumbnail, 16:9, sized for a video platform. Keep my face, hairstyle, and skin tone clearly recognizable — do not beautify or replace my features. Give me a cool, confident, moody main-character aura: a hard cold stare into the camera, mouth closed, absolutely not smiling. Render me as a photoreal in-engine game character occupying the right third of the frame in a tight shot, with a neon Vice City street and a supercar filling the left two-thirds behind me. Add a short invented headline in a heavy condensed typeface across the left side in high-contrast white with a thick dark outline. Punchy saturated grade, strong rim light, crisp at small sizes. Invented text only — No real logos, no brand marks, no watermark.
Those last five all bake text or UI into the image. That is the one job GPT Image 2 is clearly best at right now — Nano Banana Pro and Midjourney will garble a small ammo counter or a case number. Pick the model to match the job, not the brand.
Want more than nine? The full GTA 6 prompt library has 38 prompts with a rendered example each, including couple and crew posters, your pet as a GTA character, and menu and map screens.
Which AI Tool to Use
- Photoreal "real to GTA" render: Nano Banana Pro (the Gemini "Nano Banana" trend) is the current default — it holds a real-looking render better than anything else.
- Illustrated loading-screen / poster: Midjourney V8.1 is still unmatched for the painted, cel-shaded cover-art look.
- Anything with text baked in — the mugshot, the WASTED card, the HUD, the thumbnail: GPT Image 2. It leads on in-image typography, and the others garble small text.
- All nine examples above were made with GPT Image 2 (image-to-image) from the exact same photo.
The one instruction that matters most: tell it to keep your face recognizable. Image models love to "improve" you into a generic model. Lock your likeness explicitly, and use a clear, front-lit photo — exactly like the plain one we used above.
How to Write Your Own GTA Image Prompt
Four parts, every time:
- Name the look — "Grand Theft Auto VI loading-screen portrait" (illustrated) or "photoreal GTA 6 in-game screenshot, no HUD" (real-to-GTA).
- Lock your face — "keep my face and likeness recognizable."
- Add the attitude — "cool, moody main-character stare, serious, mouth closed, not smiling." GTA leads don't grin — this is what gives the output its aura, even from a smiling photo.
- Set the world — neon Vice City, palm trees, art-deco, wet streets, pink-purple lighting.
- Close the gates — "no on-screen text, no logos." Keeping logos out also avoids the copyright flags that fail a lot of GTA generations.
Want It to Move?
A GTA image gets a double-take. A GTA trailer gets a "wait, is that you in GTA 6?" — and a share. Same it's-you payoff, but you step out of the car, the neon flickers, and you deliver a line. If you're going to make one thing, make the one that moves.
GTA 6 Trailer
Turn one selfie into a cinematic 15-second GTA 6 trailer starring you — neon Vice City, the crew, the heist, the getaway. No prompts, no editing.
Related Reading
- How to Make a GTA 6 AI Video of Yourself — the one-selfie cinematic trailer.
- The Best GTA 6 AI Prompts (Copy-Paste) — the full library: 38 prompts with a rendered example each, covering trailers, crews, pets, and menu screens.
- How to Make a GTA 6 Poster With AI — the poster/cover-art angle in depth.
Not affiliated with Rockstar Games. Fan-made parody in the style of Grand Theft Auto VI.


